Best cable management for a home office desk
Cable management that actually works for home offices — trays, sleeves, and clips ranked by impact, with a simple install order that takes one afternoon.
We keep the shortlist small on purpose. One strong fit beats three mediocre Amazon cards. How we research.
Some recommended products use affiliate links. Prices are approximate and may change.
Bottom line for desk cable clutter
Start with an under-desk cable tray to get your power strip and adapter bricks off the floor. Add a cable sleeve if you have a standing desk or a visible bundle running from desktop to floor. Finish with adhesive clips to route individual cords along desk edges.
That order matches impact per dollar. Most home office cable mess is really a power-strip-on-the-floor problem — everything else is detail work.
You do not need a weekend rewiring project. One tray, one sleeve, and ten minutes with clips transform most WFH setups in a single afternoon.
Start with the power strip
Most cable mess starts at the power strip on the floor. It becomes the anchor for charger bricks, monitor cables, and random USB cords that never get unplugged. Mounting it under the desk — inside a tray — is the single highest-impact change.
Once the power source is fixed, individual cord routing becomes much easier. You know where cables originate, how much slack exists, and which cords actually need to reach the desktop.
Use a tray wide enough for your strip plus adapters. Measure before ordering — oversized trays waste space; undersized trays defeat the purpose.
Match the solution to your desk
Standing desks need flexible routing because cables must move with the surface. Sleeves and generous slack lengths matter more than rigid clips on the moving segment.
Fixed desks can use trays, clips, and grommets for a cleaner permanent setup. Consider a desk grommet if you are willing to drill — it is the cleanest path for a single monitor cable.
Glass and metal desks may limit clamp tray options. Look for screw-mount trays into the frame or adhesive-backed channels rated for the weight of your power strip.
What mattered when comparing cable solutions
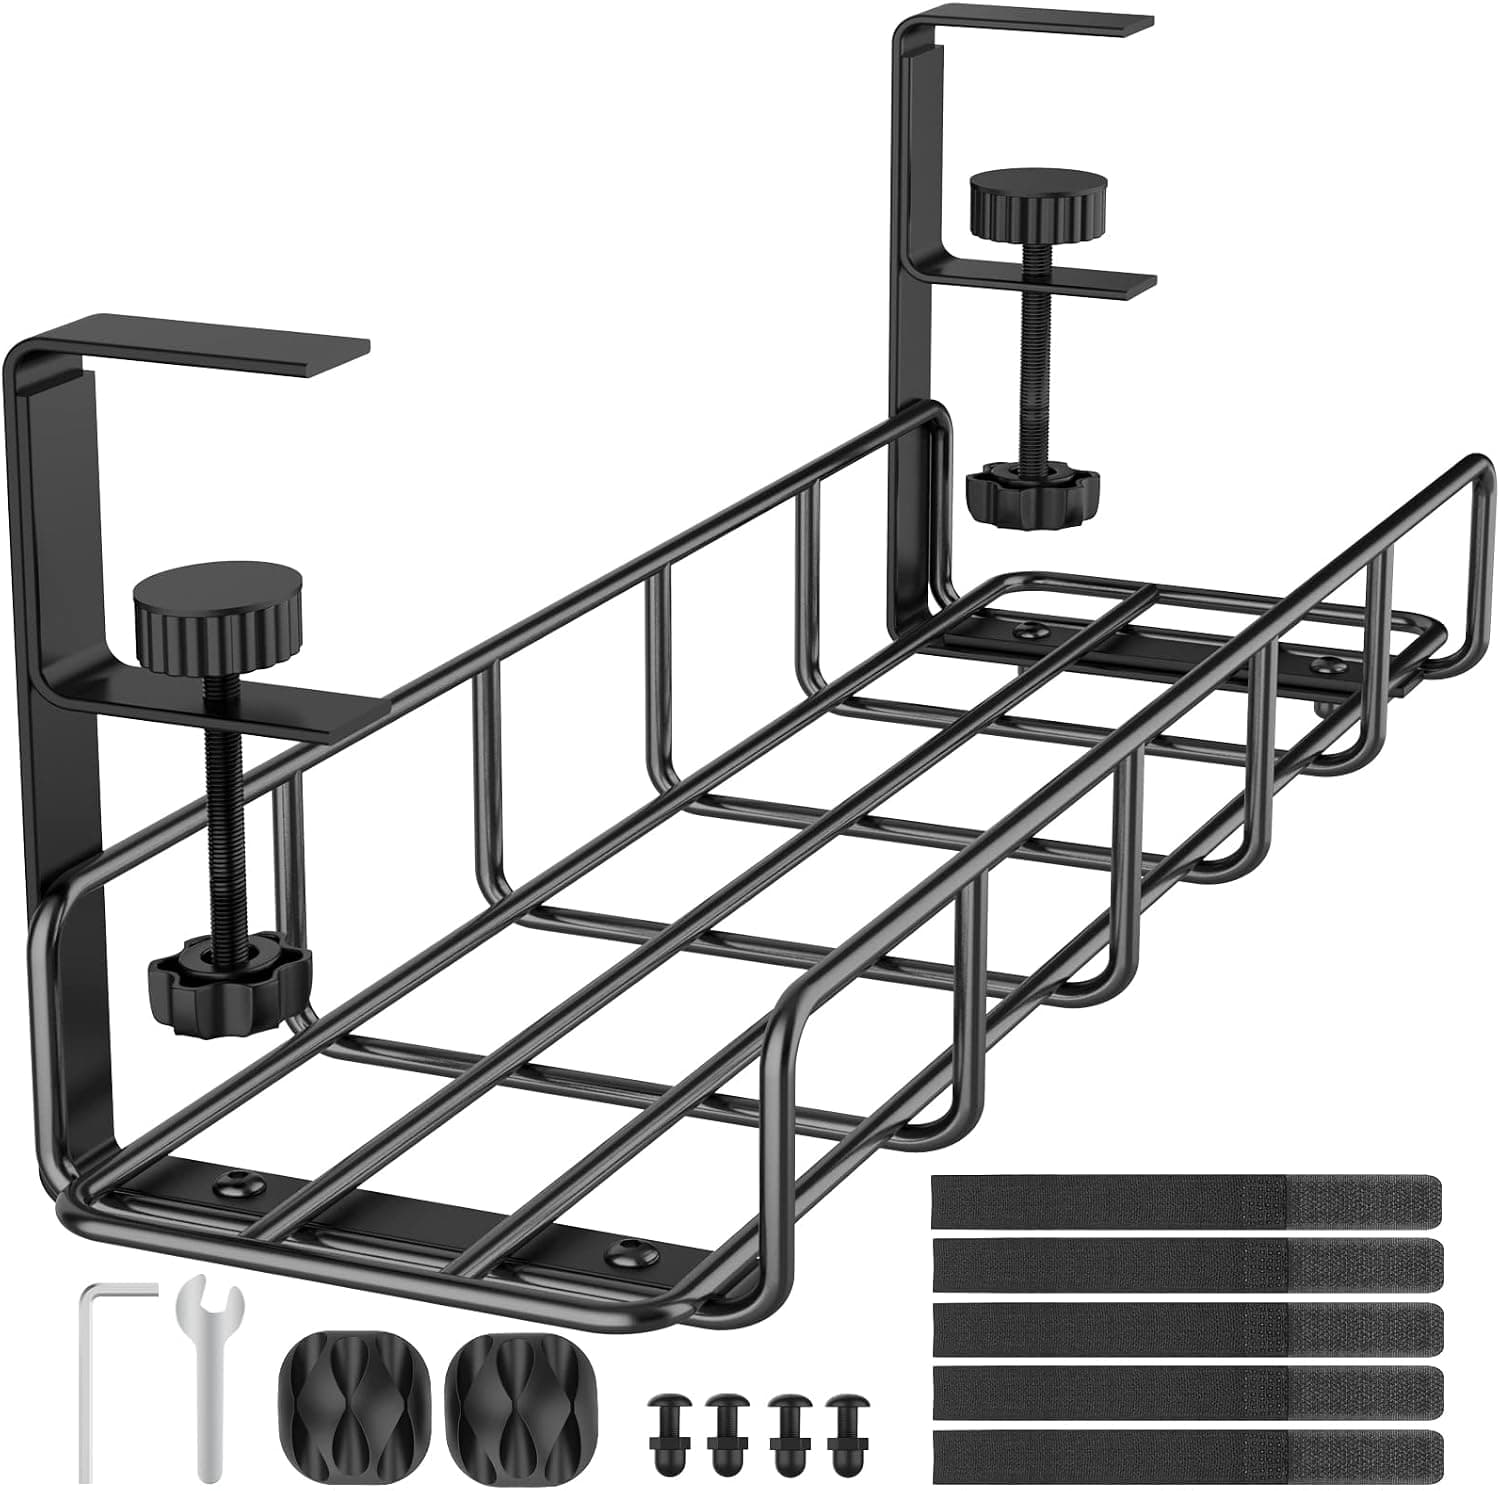
We prioritized solutions that work in rental apartments without professional installation. The REFLYING tray is the most recommended under-desk option because it fits standard power strips and installs with basic tools.
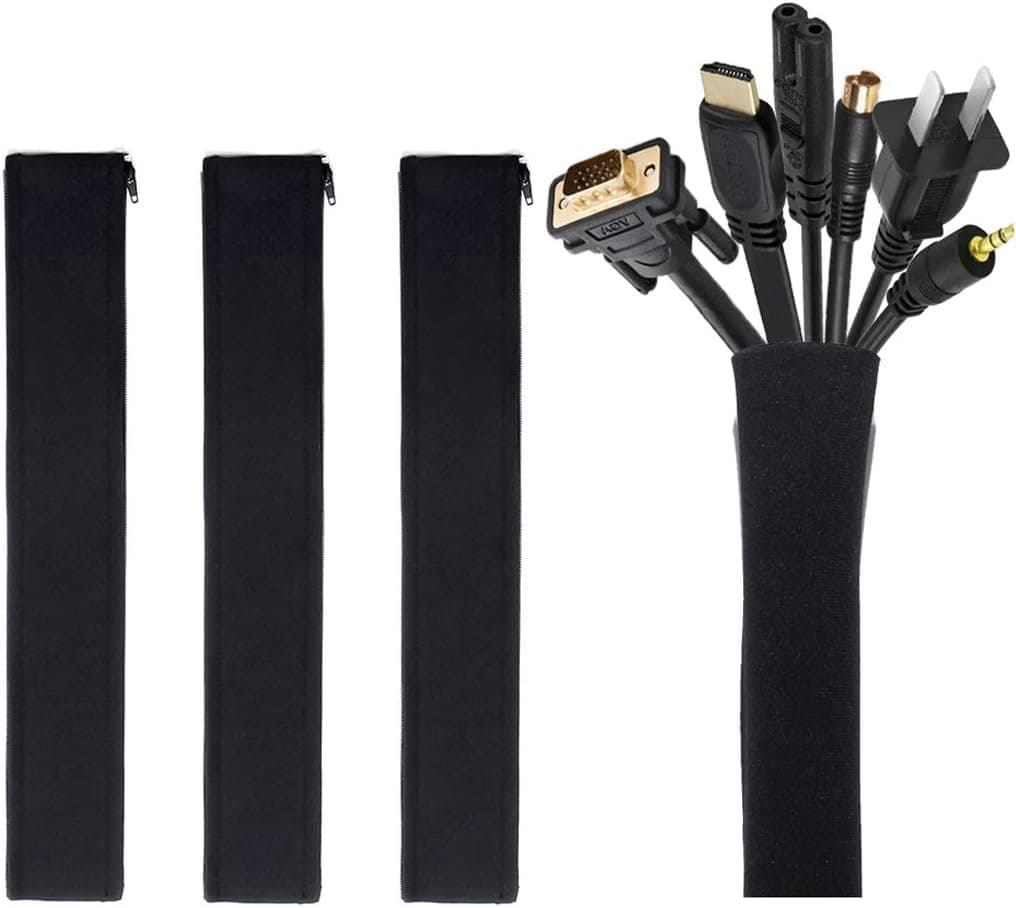
The JOTO-style sleeve is our go-to for sit-stand desks where the vertical run is the failure point. Adhesive cable clips or similar brands handle the last-mile routing that trays and sleeves do not solve.
We skipped over-engineered cable boxes that sit on the floor — they hide mess but do not fix the trip hazard or the visual clutter when you look under the desk.
Cable management mistakes that backfire
Do not zip-tie cables taut on a standing desk. Leave slack in the moving segment or the desk will pull on ports when it rises.
Do not mount a tray before labeling which cable goes where. Unplug, route, and test once before cutting ties or applying permanent clips.
Avoid mixing cheap adhesive clips on hot surfaces — power adapters and some LED strips generate heat that weakens glue.
Do not buy a tray that is too shallow for your power strip. A strip that hangs over the edge is worse than one on the floor.
Layered approach that sticks
Layer 1: power and bricks under the desk in a tray. Layer 2: vertical service loop if the desk moves. Layer 3: desktop path clips for keyboard and hub leads. Skipping layer 1 makes layers 2–3 cosmetic only.
Label both ends before you zip-tie anything. ‘Monitor HDMI’ at the PC and at the screen saves future-you during travel unplug.
Photograph the finished layout. Reassembly after moving apartments takes minutes with a reference image.
Standing desk specific rules
Nothing tethered to the floor should connect taut to the moving top. Articulating links or extra slack at the lowest desk position are mandatory.
Route heavy power cables separate from USB and audio to reduce interference on cheap unshielded runs.
Over-engineering traps
Forty-dollar cable combs for three wires is Instagram, not engineering. Match effort to device count.
Permanent epoxy channels make sense in corporate installs, not rental bedrooms you leave in a year.
Return window after standing cycles
If you use a height-adjustable desk, run ten full sit-stand cycles after installing trays and sleeves. Cables that looked tidy at sitting height often pull taut at standing height — fix with service loops before the adhesive sets your mistakes permanent.
Photograph labels at both ends of HDMI and dock cables before you zip-tie. Returns and upgrades go faster when you can rebuild in an hour instead of guessing which brick fed the monitor.
Apartment moves happen. Design for disassembly: reusable ties, clamp trays, and fabric sleeves beat epoxy under a desk you might leave in twelve months. A weekend cable project should survive one relocation without cutting everything.
Apartment landlord and heat constraints
Clamp trays and adhesive clips must survive lease-end inspections — photograph desk surfaces before install and prefer removable routes on landlord furniture. Permanent grommets in rental bedroom desks are rarely worth the security deposit risk unless you own the top outright.
Power bricks clustered in a sealed tray without airflow trip thermal protection on cheap strips during summer AC fights with space heaters on the same circuit. Stagger high-draw devices across outlets and leave finger-width gaps between adapters so heat does not cook HDMI dongles.
Who should skip elaborate cable cosmetics: hot-deskers rebuilding weekly, laptop-only workers with one charger, and desks that must clear nightly for dining. Three clips and one tray beat forty-dollar combs. Return-window standing test: if any cable tugs ports when the desk rises, add slack before zip ties harden the mistake.
Travel unplug days without rebuilding the tree
If you unplug the laptop weekly, design a breakaway layer: dock upstream cable labeled at both ends, monitor paths on separate labeled leads, power strip stays mounted. One-handed disconnect beats yanking five identical USB-C cables from memory.
Photograph the finished tree from three angles — under tray, rear spine, desktop clips. Reassembly after a hotel week or apartment move takes twenty minutes with photos, two hours without.
Avoid permanent zip ties on the dock upstream until layout survives ten unplug cycles. Reusable velcro ties at the breakaway points survive travel; epoxy combs do not.
Hot-desk between kitchen and bedroom: a portable cable bag with labeled short leads may beat mounted trays you tear down nightly. Permanent installs reward stable desk geometry for a full quarter.
Measurement checklist before ordering trays
Measure desk underside depth at the clamp zone, strip length plus two inches slack per brick, and knee clearance with chair pushed in. Trays ordered from hero photos often block thighs on 24-inch deep tops.
Standing desks need service loop length at lowest height plus full lift travel — measure with a string before you cut cable ties. Articulating sleeves cost less than replacing a crushed HDMI port.
Count devices that need permanent power versus occasional unplug — each occasional device deserves a breakaway tie, not burial under zip ties behind the tray.
Who should stop at layer one: laptop-only workers with one charger, desks cleared nightly for meals, and renters on glass tops where clamps fail. Three adhesive clips along the rear edge often finish the job without drilling.
Short answers below — use them only if the criteria above already match your constraints.
Quick picks
Highest impact
Under-desk cable tray
Gets the power strip off the floor — the single biggest visual and practical upgrade.
Best for sit-stand desks
Cable sleeve wrap
Bundles moving cords so height changes do not snag or yank.
Quickest fix
Adhesive cable clips
Routes individual cables along desk edges in minutes — ideal for renters.
Default picks (skip if constraints disagree)
These products illustrate the criteria above — they are not a mandatory shopping list. Skip any pick that fails your desk depth, budget, noise limits, or return logistics.
Best overallA steel tray that mounts under the tabletop to hold power strips, adapters, and coiled slack — the foundation of almost every clean desk photo you have bookmarked.
Best for: Anyone with a power strip on the floor and multiple device chargers.
- +Fits most desks with clamp or screw mount
- +Keeps power strip and bricks off the floor
- +Instant visual upgrade for video calls and room photos
- −Needs minimum desk thickness for clamp models
- −Does not replace routing on the moving part of sit-stand desks
 Best for standing desks
A flexible neoprene wrap that bundles monitor, USB, and power cords into one clean line — especially valuable when cables must move with a standing desk.
Best for: Sit-stand desk owners and anyone with a visible vertical cable run.
- +Zips open for adding or removing cables
- +Flexible enough for height-adjustable desks
- +Cheap upgrade with outsized visual impact
- −Does not hide the power source — pair with a tray
- −Neoprene collects dust over time in dusty rooms
Side-by-side comparison
| Feature | Cable tray | Cable sleeve | Adhesive clips |
|---|---|---|---|
| Typical price | $20 – $45 | $10 – $20 | $8 – $15 |
| Main job | Hide power strip + slack | Bundle vertical runs | Route individual cords |
| Install time | 15 – 30 minutes | 5 – 10 minutes | 2 – 5 minutes |
| Renter-friendly | Mostly — clamp options exist | Yes — no marks when removed carefully | Yes — removable adhesive |
| Sit-stand compatible | Yes — mount to frame | Essential for moving segment | Limited — fixed routing only |
| Best if you… | Have cords on the floor | Desk moves up and down | Need a fast tidy-up |
The verdict
Mount the REFLYING tray first and get the power strip off the floor. Add the JOTO sleeve if your desk moves or you have a messy vertical run. Use adhesive clips for the final tidy along edges. That three-step stack solves 90% of home office cable problems without drilling.
Advertisement
Ad placement activates after cookie consent.
FAQ
How much slack do I need on a standing desk?+
Leave enough extra length in the moving portion for the desk at its highest position plus a few inches of bend radius. Test full range of motion before securing the final clip or tie point.
Will adhesive clips damage my desk?+
Quality removable adhesive usually releases cleanly from sealed wood, laminate, and metal. Test on an inconspicuous spot first. Avoid adhesive on unfinished wood or peeling veneer.
Do I need a cable tray and a sleeve?+
Not always. Fixed desks with a tidy floor often only need a tray. Standing desks almost always benefit from both — tray for power at the frame and sleeve for the vertical bundle that moves.
Should I label my cables?+
Yes, if you have more than three devices. Masking tape and a marker take two minutes and save frustration the next time you unplug for a desk move or monitor swap.
Related guides
Keep reading

Published 2026-07-05 · Updated 2026-07-26