Best desk cable clips and trays compared
Cable clips vs under-desk trays — side-by-side comparison of what each solves, top picks, and the install order that fixes 90% of desk cable mess.
This is a decision guide first. The comparison table is the core; product examples only illustrate the trade-offs. How we research.
Affiliate links may be present in this comparison.
Bottom line for clips and trays
Trays beat clips on impact — start with REFLYING tray under the desk for power. Add PAMAZ clips for individual routing. Add JOTO sleeve if desk moves up and down.
Clips alone leave power strip on floor — the root mess remains.
Full comparison: tray first, sleeve second if standing, clips last for detail.
Clips vs trays — different jobs
Trays hold weight — power strips, bricks, coiled slack. Clips guide paths — one HDMI, one USB-C along leg. Using clips without tray is like organizing drawers while laundry covers the floor.
Sleeves bundle — multiple cords moving together — standing desk vertical run.
Install order that works
Step one: mount tray, move strip and bricks up. Step two: unplug, route cables with slack for standing. Step three: sleeve vertical bundle if needed. Step four: clip final paths to desk leg.
Label cables before zip ties — future you swaps monitors.
What mattered when comparing cable clips
Same picks from our cable management guide — validated across comparison format. REFLYING tray, PAMAZ clips, JOTO sleeve cover 90% of home offices.
We skipped overpriced branded cable boxes that sit on floor unchanged.
Cable clip mistakes under the desk
Do not clip cables taut on standing desks.
Avoid mixing twelve clip brands — uniform black clips look cleaner.
Do not mount tray before measuring knee clearance.
Skip cheap trays that bend under strip weight.
Who needs clips, trays, or both
If your power strip still lives on the floor with bricks stacked on top, start with an under-desk tray. Clips cannot fix mass and bulk; they only tidy paths. People who already stashed the strip under the desktop usually get the most from adhesive clips along one desk leg and the rear edge.
Standing-desk users almost always need a third tool: a flexible sleeve or articulated cable chain on the moving vertical run. Without that, lifting the desk yanks HDMI or USB-C taut and can damage ports over months.
Renters should prefer clamp trays and removable adhesive. Avoid drilling into landlords' furniture until you know the desk stays with you.
If you hot-desk between kitchen and bedroom, a portable cable box with a lid is sometimes faster than mounting hardware you will tear down in six months. Permanent installs reward people who have already lived with the same desk layout for a full quarter.
Desk types change the install
Solid wood and thick laminate accept clamps easily. Glass tops and very thin IKEA-style tops may need a screw-in rail or a freestanding power shelf instead of a clamp tray — measure thickness before ordering.
Corner and L-shaped desks often need two shorter trays rather than one long center tray so knee clearance stays open on both wings. Route monitor and laptop power toward the corner post where cables naturally gather.
On height-adjustable frames, leave an intentional service loop above the tray. A tidy 100% taut install looks perfect at sitting height and then fails the first time you stand.
Metal standing-desk legs sometimes accept magnetic cable guides where clamps cannot bite. Pair those with a short fabric sleeve on the lift column so the magnet does not slide when you wipe dust weekly.
What to skip
Skip oversized floor cable boxes that still create a trip edge in a small room. They hide mess visually without moving weight off the floor path.
Skip rainbow packs of clips in five colors on a work desk — visual noise cancels the calm you wanted. One matte black or white finish reads intentional.
Skip binding every cable with permanent zip ties on day one. Use reusable ties until the layout is stable for two weeks of real work.
Skip routing every cable through one hole in the desktop unless you know exactly which devices stay. A single grommet looks clean until you swap monitors and realize three cables are trapped.
A simple weekend workflow
Unplug and photograph the current mess so you remember which brick feeds which device. Mount the tray and relocate the strip. Power on once to confirm nothing browns out.
Next, raise the desk to standing height (if applicable) and watch which cable goes tight first — that cable gets the sleeve or longer run. Finally clip desktop paths and label both ends of HDMI and dock cables.
Budget realistically: tray ~$20–30, clips ~$10, sleeve ~$12. Doing only clips rarely feels finished; the tray is what makes the room look cared for.
On Monday, run one full workday before you declare victory. Laptop sleep, dock reconnect, and standing cycles reveal weak points that a Sunday afternoon test misses.
Cable length and adapter discipline
Buy cables slightly longer than the tidy minimum. A six-inch HDMI run looks perfect until you add a monitor arm that swings forward. One extra foot of slack behind the tray costs little and saves a reorder.
Keep adapter sprawl in the tray, not on the desktop. USB-C to HDMI dongles, Ethernet adapters, and SD readers should live on short pigtails so you can swap laptops without rebuilding the whole tree.
Color-code by function, not by brand. One color for display paths, another for power bricks, a third for audio. Your future self will thank you when troubleshooting a dead webcam at 8:55 a.m.
When clips alone are enough
Laptop-only workers with one charger and a short USB hub sometimes need only three clips: one at the rear edge, one on the leg, one at the power brick. Do not over-buy trays if your entire setup fits in a backpack.
Shared dining tables benefit from clips that release without residue because you clear the surface nightly. Clamp trays on a table you eat at are awkward — prefer a freestanding power strip with a weighted base instead.
Return-window checks before you commit
Mount hardware looks perfect on Sunday and fails on Wednesday when you stand for the first time during a live call. Use the first two weeks inside the retailer return window as a stress test: full sit-stand cycles, laptop sleep, dock reconnect, and one video meeting with the camera pointed at the rear edge.
Photograph adhesive placement before you peel clips off for a return. Landlords and desk brands sometimes dispute damage when residue patterns do not match the original install. Clamp trays should leave only faint marks — if the rubber pad compressed the laminate, note it before day thirty.
If a tray sags or a clip releases after a humid week, that is a return signal, not a reason to stack more adhesive. Weight ratings assume even load; a power strip plus three bricks on one end of a long tray will twist mounts long before the stated limit on paper.
Heat buildup under crowded trays
Power bricks and passive USB hubs generate more heat than people expect when you stack them in a closed tray. Apartment offices with afternoon sun on the desk leg can push brick temperatures high enough to throttle laptop charging or trip cheap surge protectors. Leave air gaps between adapters instead of packing the tray like a drawer.
Who should skip under-desk trays entirely: laptop-only workers with one charger, hot-desk users who rebuild weekly, and anyone on a glass-topped dining table where clamp geometry fails. Three adhesive clips along the rear edge often finish the job without trapping heat under particleboard.
Size the tray to the strip you actually own, not the longest SKU in search results. A 16-inch tray on a 48-inch desk centered under the monitor zone beats a 24-inch tray that sags because you loaded bricks on the unsupported middle span. Measure strip length plus two inches of slack per cable before ordering.
Side-by-side comparison
| Feature | Under-desk tray | Adhesive clips | Cable sleeve |
|---|---|---|---|
| Typical price | $20 – $30 | $8 – $12 | $10 – $15 |
| Primary job | Hide power + slack | Route single cables | Bundle moving runs |
| Impact score | 10/10 — floor clear | 6/10 — tidy edges | 8/10 — standing desks |
| Install time | 20 min | 5 min | 10 min |
| Renter OK | Clamp models yes | Mostly yes | Yes |
Examples that fit the comparison
These products illustrate the criteria above — they are not a mandatory shopping list. Skip any pick that fails your desk depth, budget, noise limits, or return logistics.
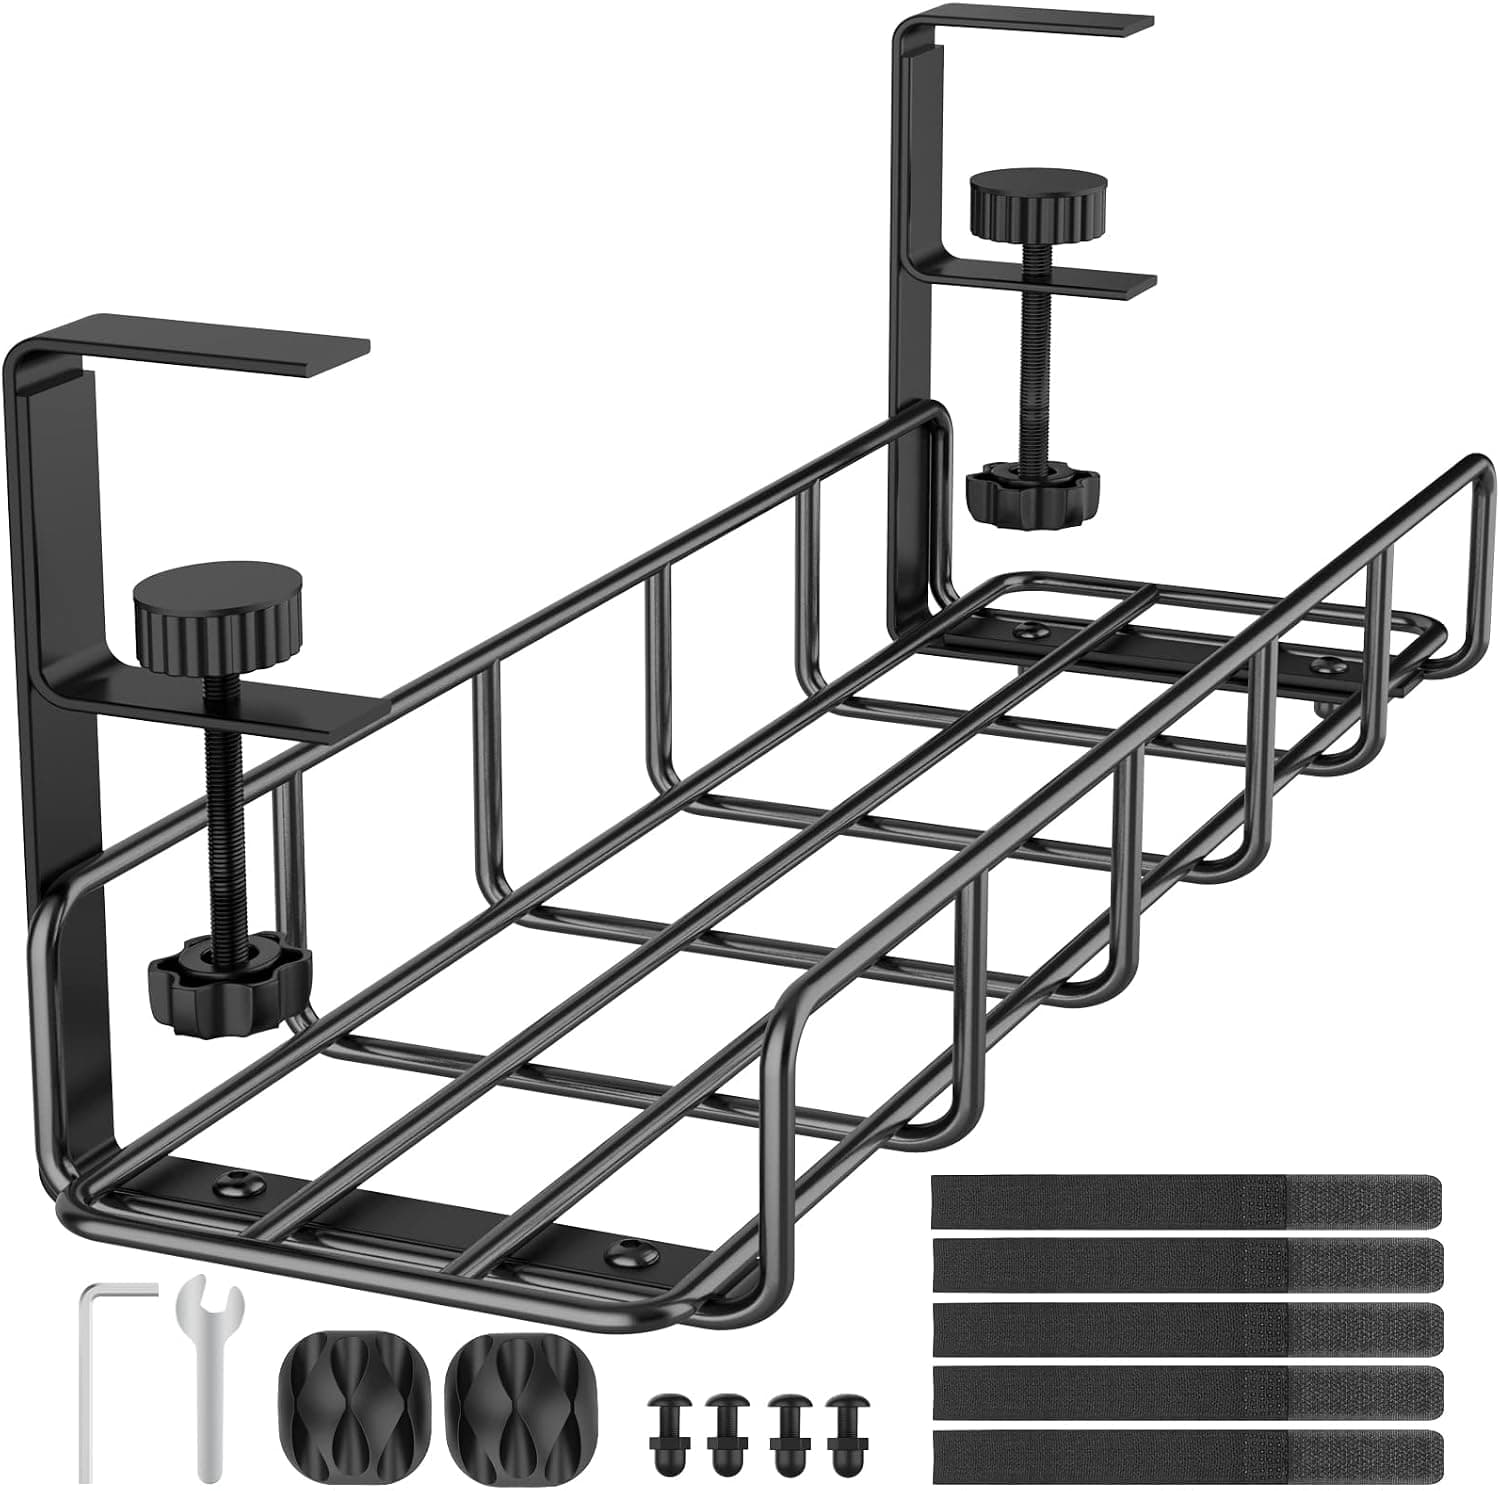
Best overallSteel tray under desktop for power strips and adapters — the anchor product in any cable management comparison because floor clutter starts at the strip.
Best for: Anyone with visible power strip and charger bricks on the floor.
- +Transforms under-desk zone in one install
- +Clamp mount — no screws on many desks
- +Pairs with clips for finishing touches
- −Does not route individual USB runs alone
- −Needs desk thickness for clamp
 Best clips
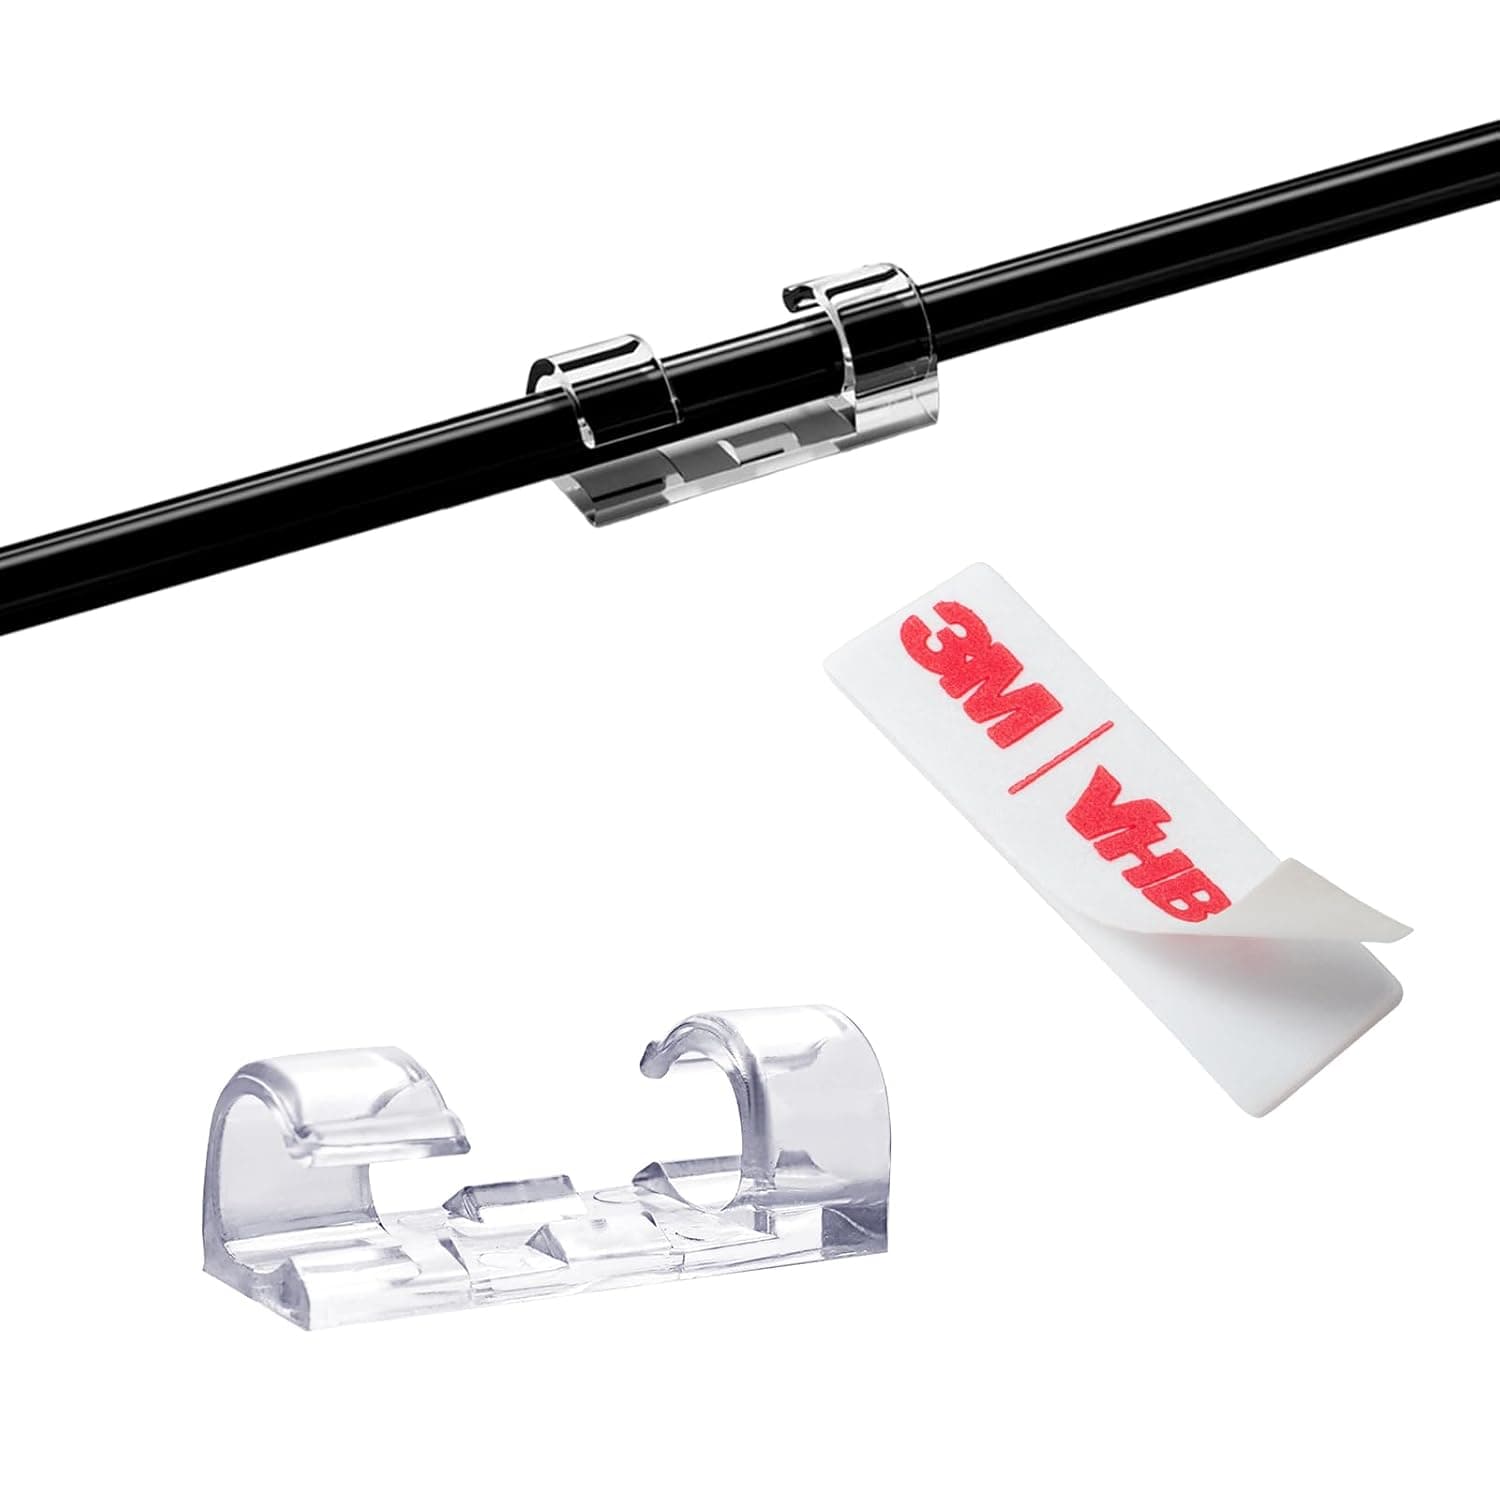
Small clips that route individual cables along desk edges and legs — the detail work after tray handles power anchor.
Best for: Finishing cable paths from desk to floor without bulk sleeves.
- +Fast install — peel and stick
- +Works for USB, HDMI, and thin power cords
- +Cheap enough to replace when moving desks
- −Adhesive weakens on hot surfaces
- −Not for thick power cables alone
 Best for standing
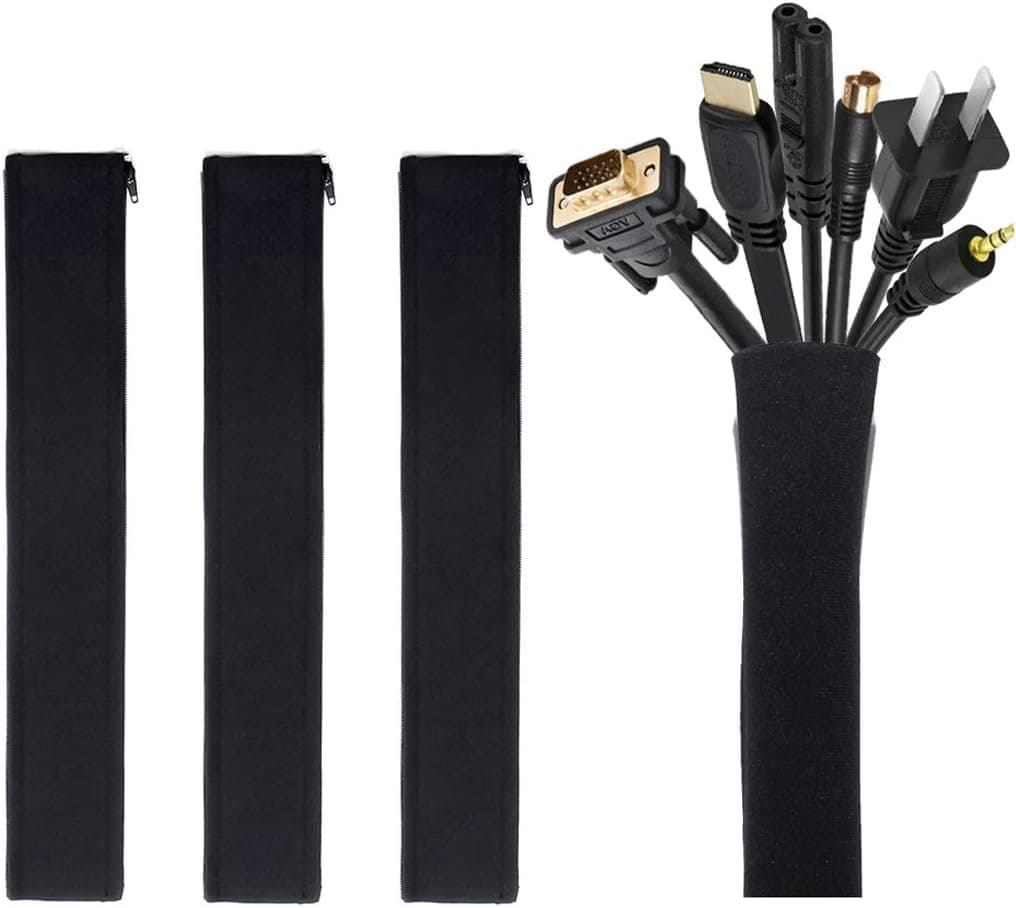
Neoprene zip sleeve bundling multiple cords — essential comparison pick for sit-stand desks where vertical segment moves.
Best for: Standing desk users whose cables snag on lift.
- +Zips open to add cables later
- +Flexible for height adjustment
- +Hides six-plus cords as one line
- −Does not replace tray for power strip
- −Collects dust over time
The verdict
Buy the tray before clips — SimpleHouseware under-desk tray then PAMAZ clips for edges. Standing desk owners add JOTO sleeve on the moving segment. That three-part stack beats any clip-only shopping cart.
Advertisement
Ad placement activates after cookie consent.
FAQ
Clips or tray first?+
Tray first — always. Clips finish what tray starts.
Magnetic clips vs adhesive?+
Magnetic good for steel desks and removable routing. Adhesive better for wood and laminate — test removal on hidden spot.
One sleeve or multiple?+
One sleeve for vertical moving bundle; separate clips for desktop horizontal runs to monitor.
Cable box on floor?+
Floor boxes hide visually but trip hazard remains — under-desk tray superior for WFH.
Will adhesive clips ruin a laminate desk?+
Quality clips on clean, cool laminate usually remove cleanly within a few months. Warm the adhesive slightly and peel slowly. Test behind the monitor first. For rental-critical furniture, use clamp trays and magnetic clips on metal legs instead.
Related guides
Keep reading

Published 2026-07-05 · Updated 2026-07-15